You’re giving your cat a quiet evening pet — running your hand down their back — and then you feel it.
A hard, dense knot tucked beneath the surface. Not just a little tangle. A real mat.
Your stomach drops. You pull your hand away, and your cat glances back at you with those unreadable eyes. Is she uncomfortable? Has this been there for weeks? Is it hurting her right now?
If that moment felt familiar, you’re in good company. Mats are one of the most common — and most guilt-inducing — issues cat owners face. And the good news? How to remove matted cat fur safely is something you absolutely can learn, without expensive tools or a grooming background.
This guide shows you exactly how to remove matted cat fur safely —
from the right tools to a calm step-by-step technique. how to assess what you’re dealing with, the right tools to use, a calm technique that won’t stress your cat, and when to hand things off to a professional.
Table of Contents
- What Are Cat Mats (And Why They’re More Dangerous Than They Look)
- What Causes Matted Cat Fur
- Why Mats Get Worse Over Time
- Is Matted Fur Painful for Cats?
- ⚠️ When You Should NOT Remove Mats Yourself
- The Mat Is Against the Skin
- Your Cat Is Severely Matted
- You See Redness, Odor, or Discharge
- Your Cat Is Panicking or Aggressive
- Tools You Need Before Starting
- Dematting Comb
- Slicker Brush
- Cat-Safe Scissors (Rounded Tip)
- Detangling Spray (Optional but Helpful)
- How to Remove Matted Cat Fur Safely at Home (Step-by-Step)
- 🐾 Step 1: Calm Your Cat First
- 🔍 Step 2: Locate and Assess the Mat
- Step 3: Hold the Fur Close to the Skin
- 🔄 Step 4: Work Through the Mat — Not Against It
- 🪮 Step 5: Work Inward, Slowly
- ✂️ Step 6: When to Carefully Cut the Mat
- 💈 How Groomers Remove Matted Cat Fur (Pro Secrets)
- 🚫 What NOT to Do (Critical Mistakes)
- How to Prevent Mats in the Future
- 🚨 Severe Matting: What to Do in Emergency Cases
- Frequently Asked Questions About Matted Cat Fur
- Can matted fur cause infection in cats?
- Is it cruel to leave mats on a cat?
- Should I cut matted fur off my cat?
- Can olive oil remove cat mats?
- How long does it take to remove mats?
- How do I remove matted cat fur safely at home?
- Final Thoughts
What Are Cat Mats (And Why They’re More Dangerous Than They Look)
Most owners think mats are just cosmetic. I used to hear this all the time — until they see how much it actually pulls on the skin.
A mat forms when loose, dead fur gets tangled with the live coat — then tightens over time as your cat moves, sleeps, and grooms. What starts as a soft tangle can compress into a dense, felt-like mass that pulls constantly at the skin underneath.
What Causes Matted Cat Fur
Several things push cats toward matting faster than others:
- Long or dense coats (Persians, Maine Coons, Ragdolls) mat easily without regular brushing
- Senior cats that groom less efficiently due to stiffness or joint pain
- Overweight cats who can’t reach certain areas — especially the lower back and hindquarters
- Post-illness or stress periods when grooming behavior drops
- Collar friction, harness contact points, or areas where your cat sleeps on consistently
In my experience, the most overlooked cause is seasonal shedding that isn’t brushed out. Spring and fall are peak matting seasons, and a few skipped brushing sessions can snowball fast.
Why Mats Get Worse Over Time
Here’s what most guides don’t tell you: mats don’t stay the same size.
Every time your cat moves, the mat pulls. Loose fur nearby gets caught and woven in. The mat grows denser — and tighter. The skin underneath starts to pucker and fold. Moisture gets trapped, and bacteria can follow, leading to infections.
What was a brushable tangle two weeks ago can become a severe mat requiring professional intervention now. The longer you wait, the harder the fix.
Is Matted Fur Painful for Cats?
Yes — matted fur is often painful for cats because it pulls tightly on the skin and causes constant discomfort.
A mat that’s tight enough to pull the skin causes constant, low-grade discomfort. Cats are stoic animals; they rarely vocalize pain until it’s severe. Instead, watch for:
- Flinching or moving away when you touch a specific area
- Over-grooming or biting at one spot
- Hunched posture or reluctance to be touched
- Behavioral changes — hiding more, less playful
If you’re unsure how to read your cat’s discomfort signals, this guide on cat body language breaks down the subtle signs that something’s wrong.
One mistake I often see: owners assuming a cat is “fine” because she’s not crying. Cats mask pain instinctively. A mat that’s been there for weeks is almost certainly uncomfortable.
⚠️ When You Should NOT Remove Mats Yourself
Before you reach for any tool, do a quick assessment. Not every mat situation is a DIY job.
Stop and call a groomer or vet if:
The Mat Is Against the Skin
If you can’t slip a finger or comb between the mat and the skin, the risk of cutting your cat is real. Skin near mats is often pulled tight and folded — it looks like fur but isn’t.
Your Cat Is Severely Matted
Multiple large mats, or matting that covers significant areas (back, belly, hindquarters), is beyond home grooming. This is a job for professional clippers under proper restraint.
You See Redness, Odor, or Discharge
These are signs of skin infection or a wound developing underneath. Do not attempt removal at home. Your cat needs veterinary attention first.
Your Cat Is Panicking or Aggressive
A stressed cat that’s biting or scratching isn’t a behavior problem — it’s communication. Forcing the session will break trust and potentially injure you both. Reschedule for a calmer moment, or let a professional handle it.
When in doubt, a professional groomer or vet is always the safer call. There’s no shame in it — it’s genuinely the right choice for certain situations.
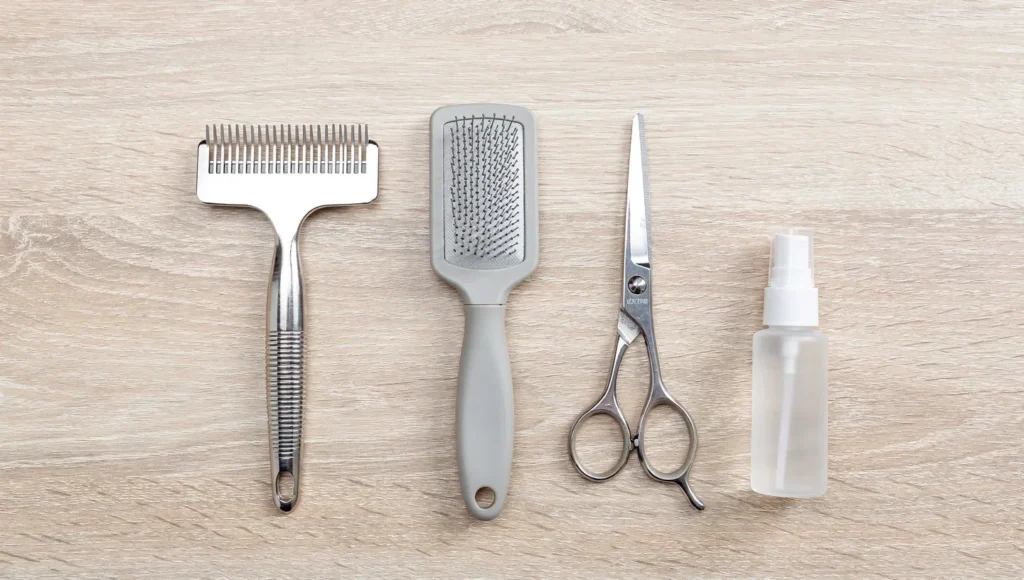
Tools You Need Before Starting
Don’t improvise. The right tools make the difference between a calm 10-minute session and a stressful ordeal.
Dematting Comb
This is your primary tool. Look for one with rotating teeth or a safety blade — it separates fur without the brutal pulling of a regular comb. Brands like Safari, Andis, or GoPets are solid options in the US market.
Slicker Brush
Use this after loosening the mat to smooth out the surrounding coat and remove shed fur. It’s also great for the prevention routine you’ll build afterward.
Cat-Safe Scissors (Rounded Tip)
If cutting becomes necessary, only use blunt-tipped scissors. Standard sewing scissors are sharp enough to pierce skin if your cat moves suddenly — and they will move.
Detangling Spray (Optional but Helpful)
A cat-safe detangling or conditioning spray softens the mat slightly and gives the comb something to glide through. Avoid anything with alcohol, strong fragrance, or ingredients not labeled safe for cats.
| Tool | Purpose | Priority |
|---|---|---|
| Dematting comb | Break apart the mat | Essential |
| Slicker brush | Smooth coat post-removal | Essential |
| Rounded-tip scissors | Last resort cutting | Important |
| Detangling spray | Soften mat before combing | Optional |
How to Remove Matted Cat Fur Safely at Home (Step-by-Step)
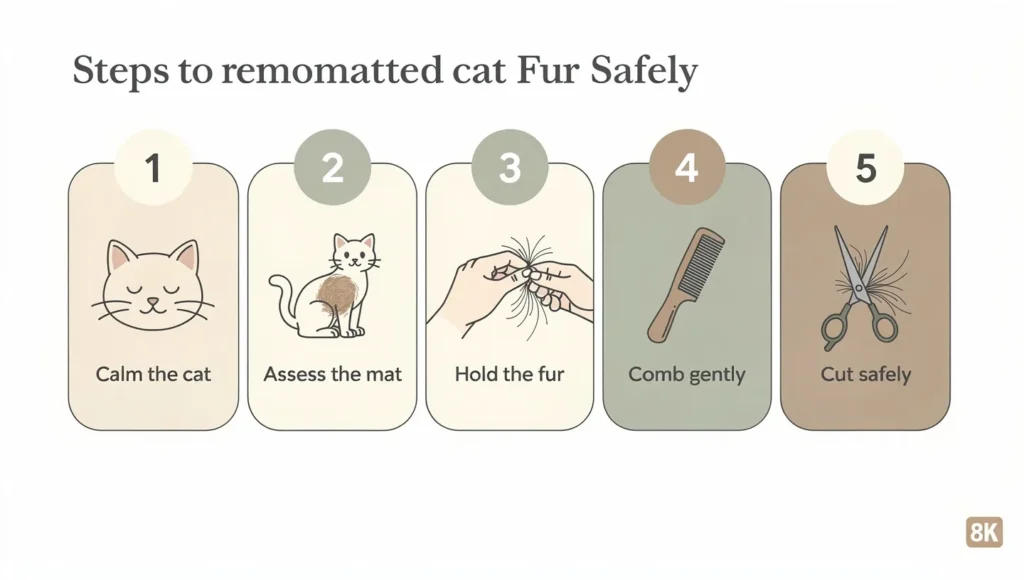
This is the section that matters most. Follow the sequence — don’t skip steps.
🐾 Step 1: Calm Your Cat First
Environment and timing are everything.
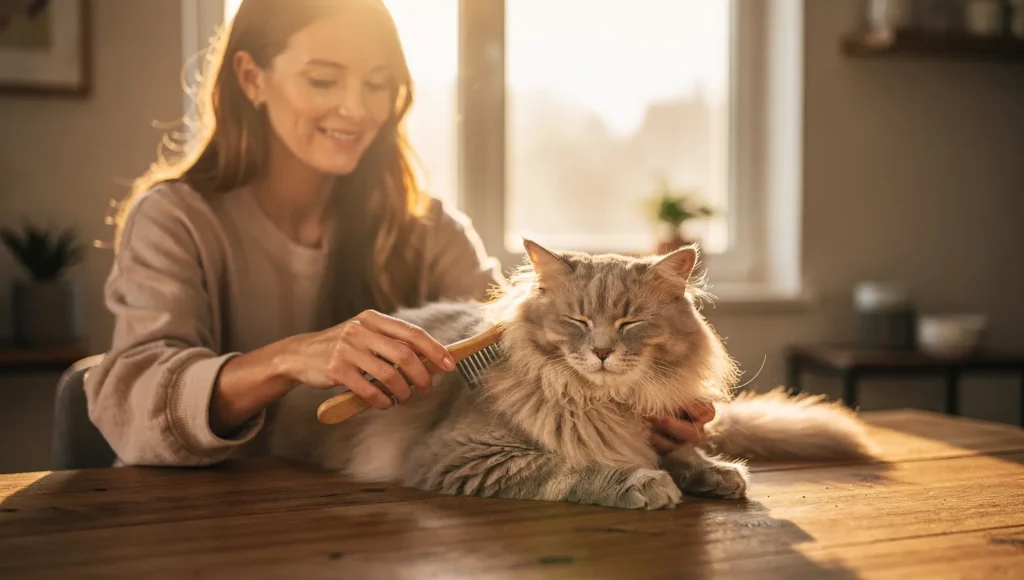
Choose a moment when your cat is naturally relaxed — after a meal, during a nap, or after a play session when energy is low. Find a quiet room with minimal foot traffic and no loud sounds.
Sit on the floor if you can. It’s less imposing than standing over your cat. Let her sniff the tools before you start. Spend two to three minutes just petting her normally — work up to the mat area gradually.
Never start a dematting session when your cat is already alert or tense. You’ll lose before you begin.
🔍 Step 2: Locate and Assess the Mat
Before touching it, look at it.
Run your fingers gently through the coat and map out:
- How many mats are there?
- How large is each one?
- How close to the skin?
- Is the surrounding skin pink, irritated, or folded?
This tells you whether you’re doing a home session or making a groomer appointment. Be honest with yourself here.
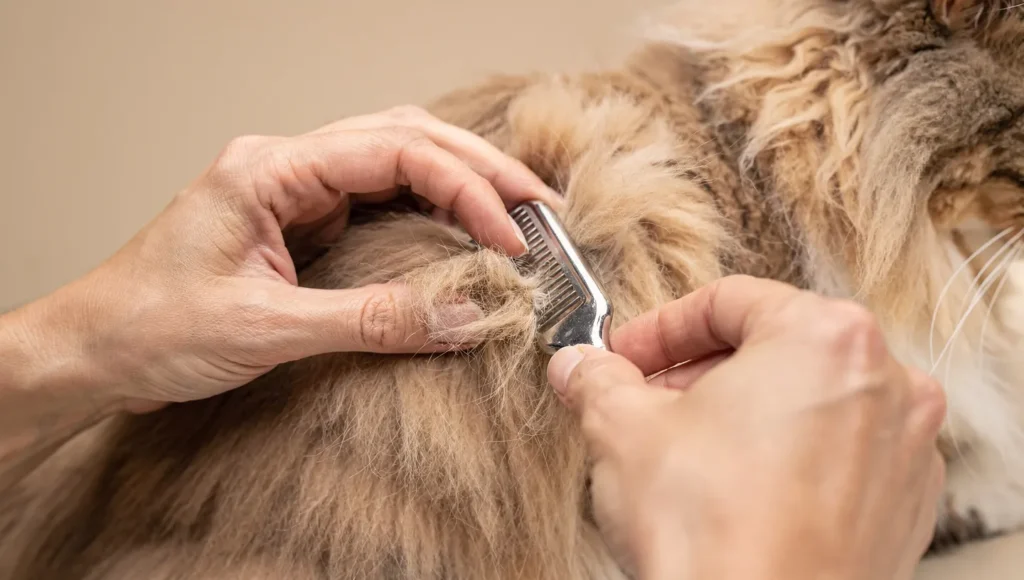
Step 3: Hold the Fur Close to the Skin
This is the single most important technique in the entire process.
With your non-dominant hand, pinch the fur between the mat and your cat’s skin — creating a barrier. This means that any pulling force from the comb gets absorbed by your fingers, not transferred to the skin.
Without this step, every comb stroke pulls at the skin. It hurts. Your cat will react.
🔄 Step 4: Work Through the Mat — Not Against It
Start at the outer edge of the mat, not the center.
Use the dematting comb in short, gentle strokes — you’re teasing apart fibers, not raking through them. Think of how you’d detangle a necklace chain: patience, small movements, no force.
Apply detangling spray if the mat feels especially tight. Let it sit for 30 seconds before combing.
If you feel resistance — stop. Reposition. Try from a different angle. The goal is zero pulling sensation on the skin.
🪮 Step 5: Work Inward, Slowly
Once the outer edges are loosening, work your way toward the center of the mat.
Switch between the dematting comb and the slicker brush periodically — the slicker brush removes loosened fur and keeps the area clear so you can see progress.
Take breaks every few minutes. Let your cat shift position. Offer a treat. This is not a race.
In my experience working with cats that have significant matting, the session length matters less than the cat’s stress level. A calm 20-minute session over two days is infinitely better than one aggressive 5-minute attempt.
✂️ Step 6: When to Carefully Cut the Mat
Sometimes the mat won’t yield to combing. If you’ve worked patiently for several minutes with no progress, cutting may be the right call.
The technique:
- Slip the comb between the mat and the skin — the comb acts as a guard
- Cut above the comb, never below it
- Make small cuts parallel to the hair growth direction
- Never point scissors toward the skin
This is how to remove matted cat hair without cutting the skin — the comb is your safety net.
If you’re not confident in this step, stop here and call a groomer. A small fee is worth avoiding an accidental cut.
For cats with heavy coats like Persians or Maine Coons, this step comes up more often — their dense fur mats faster and holds tighter than most breeds.
💡 Expert Tip
After any dematting session, reward your cat immediately and generously. Food treat, play session, or extended petting — whatever she loves most. You’re building a positive association with being handled. The next session will be easier because of what you do in the 60 seconds after this one ends.
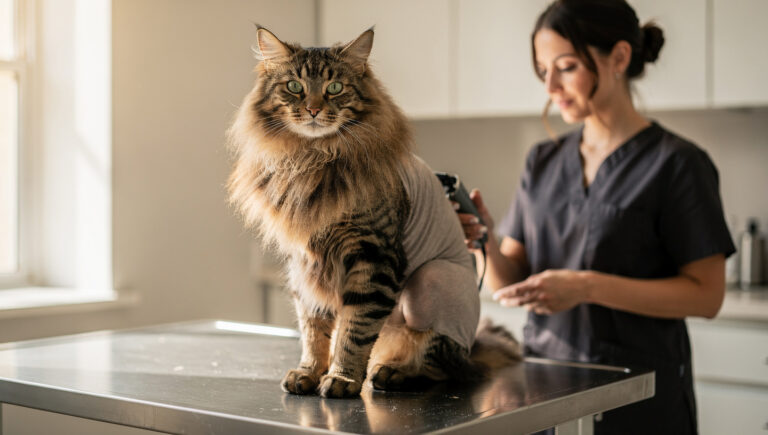
💈 How Groomers Remove Matted Cat Fur (Pro Secrets)
Professional groomers don’t fight mats — they work around them strategically.
The biggest difference between a pro and a first-timer? Clippers, not scissors. A groomer uses a fine-blade clipper to slide under the mat and lift it away cleanly, with zero pulling. Scissors near tight mats are a liability — skin folds invisibly into the mat, and one wrong move cuts flesh, not fur.
- Pros assess mat depth before touching any tool
- They use low-vibration clippers to reduce cat stress
- They section large mats and remove in stages, not all at once
- They never rush — a 45-minute session beats a 10-minute disaster
Typical cost in the US: $50–$120 depending on severity, coat type, and location. For severely matted cats, some groomers charge a “dematting fee” on top of the base groom. It’s worth every dollar compared to a vet bill for an accidental skin laceration.
🚫 What NOT to Do (Critical Mistakes)
These mistakes turn a manageable situation into an emergency.
- Don’t pull the mat — ever. Pulling stretches and tears the skin underneath
- Don’t use regular scissors — kitchen scissors, craft scissors, or sewing scissors all lack the blunt tip needed to work safely near skin
- Don’t rush the session — a stressed cat becomes a moving target, and moving targets get cut
- Don’t bathe your cat before removing mats ❌ — water tightens mats dramatically, compressing them into dense, nearly impossible knots. Always demat before any bath
One mistake I often see is owners reaching for whatever scissors are nearby in a panic. If you don’t have rounded-tip grooming scissors, stop the session and order them first. Two days of waiting beats a vet visit.
If your cat already needs a bath after dematting, check out this stress-free cat bathing guide for the right sequence and technique.
How to Prevent Mats in the Future
Prevention is dramatically easier than removal. Here’s what actually works:
- Brush long-haired cats daily — 5 minutes is enough to prevent 90% of mats
- Brush short-haired cats 2–3x per week during shedding seasons (spring and fall)
- Focus on high-friction zones — behind the ears, under the armpits, collar area, and hindquarters
- Support coat health from the inside — a diet rich in omega-3 fatty acids produces a smoother, less tangle-prone coat. See the complete cat diet guide for practical nutrition tips
- Schedule professional grooming every 6–8 weeks for dense or long-coated breeds
For breed-specific brushing needs, this brushing guide covers techniques and tool recommendations for every coat type.
🚨 Severe Matting: What to Do in Emergency Cases
If your cat’s coat is matted across large areas — back, belly, or full hindquarters — this is a medical situation, not a grooming appointment.
- Shaving may be the only option. A groomer or vet will use clippers to remove the entire matted coat close to the skin. The coat grows back fully within 3–6 months
- Skin underneath severe mats is often raw, folded, or infected — a vet should assess before any grooming begins
- Post-shave skin care matters: keep the area clean, dry, and away from direct sun until the coat returns
- Cats that have experienced severe matting once are at higher risk — build a consistent brushing routine immediately after recovery
I’ve worked with cats that arrived at grooming appointments so severely matted their skin had begun to ulcerate underneath. At that point, the priority shifts entirely to healing — not appearance. Don’t let it reach that stage.
Frequently Asked Questions About Matted Cat Fur
Can matted fur cause infection in cats?
Yes. Severe mats trap moisture and bacteria against the skin, which can lead to infections, irritation, and even open sores if left untreated.
Is it cruel to leave mats on a cat?
Yes. Mats pull continuously at the skin, trap moisture, restrict movement, and can develop into open wounds over time. Even a single tight mat causes ongoing discomfort. Leaving mats untreated is not a neutral choice.
Should I cut matted fur off my cat?
Only as a last resort, and only with blunt-tipped scissors and a comb held between the mat and skin as a guard. Combing is always the first approach. If the mat won’t yield after patient effort, a professional groomer with clippers is safer than scissors at home.
Can olive oil remove cat mats?
Olive oil can soften a mat slightly, but it leaves a greasy residue that attracts more dirt and fur — and must be fully washed out afterward. A cat-safe detangling spray is a far better option. Bathing after attempting an oil treatment also risks tightening any remaining mat further.
How long does it take to remove mats?
A single small mat: 5–15 minutes with the right tools and a calm cat. Multiple mats or a dense coat: plan for several sessions spread over a few days rather than one long, stressful attempt. Always prioritize your cat’s stress level over speed.
How do I remove matted cat fur safely at home?
The safest way to remove matted cat fur safely at home is to use
a dematting comb, hold the fur close to the skin, and work
from the edges inward with short gentle strokes.
Final Thoughts
Finding a mat on your cat doesn’t make you a bad owner. It makes you a normal one — because mats happen, even to the most attentive households.
What matters now is how you respond: calmly, with the right tools, at your cat’s pace.
Start with the smallest mat. Use the finger-pinch technique. Take breaks. Reward generously. And if a mat is too close to the skin, too large, or your cat is too stressed — call a professional without hesitation. That’s not giving up. That’s making the right call.
Your cat can’t tell you when she’s uncomfortable. But she shows you — in the way she flinches, the way she hides, the way she stops letting you touch certain spots. Now you know what to look for, and exactly what to do about it.
Now you know how to remove matted cat fur safely — one mat, one calm session at a time. You’ve got this.